Back to Home

Connect banks with Lunch Flow

A walkthrough to connect your bank in Liquify, then set balance, amounts, and date in Lunch Flow so Liquify matches what you see at the bank.

Who this is for

Anyone on Liquify Ultra—including the free 30-day trial—who wants to connect banks in Other regions through Lunch Flow. Liquify never sees your bank password; you authorise the bank in Lunch Flow, then Liquify reads balances and transactions.

Before you start

  • Liquify Ultra (subscription or free 30-day trial)
  • A bank supported by Lunch Flow
  • About 10 minutes to connect and check Balance, Amounts, and Date

Lunch Flow portal

1. Connect your bank in Liquify

In Liquify open Connect bank, pick Other regions, then Connect. Sign in with your bank in the Lunch Flow portal, add your institution, and authorise the accounts you want to share.

Return to Liquify — the app finishes the connection when you come back. Use Reconnect in Liquify any time you need to authorise again.
2. Open account settings in Lunch Flow

Lunch Flow lets you tune each account from its portal. Open Connections, select the account, and use the tabs below.

3. Choose the right balance

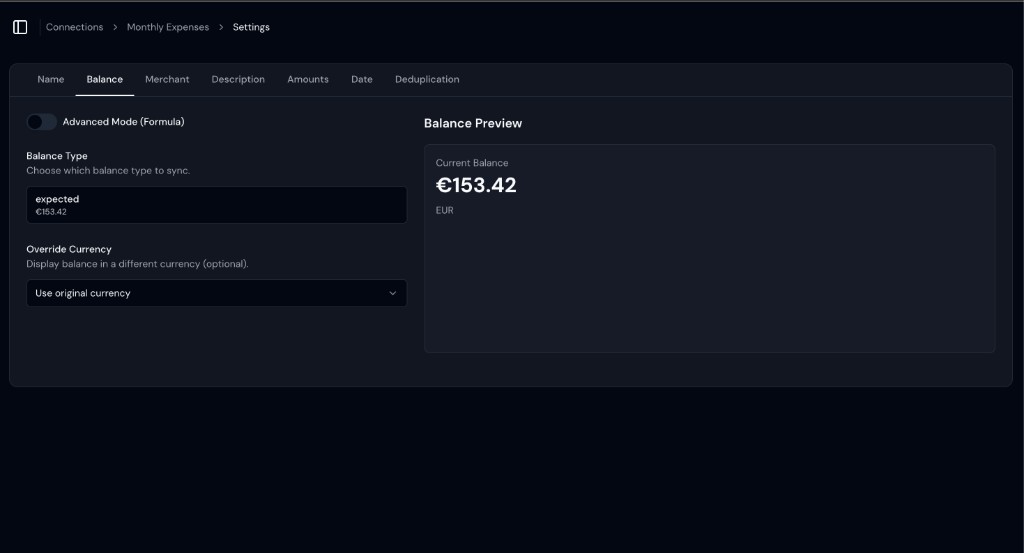
Lunch Flow sends one balance per account, and options on the Balance tab vary by bank. Pick the type that matches the balance you see in your bank app—that’s the number Liquify uses for Accounts and box target vs actual.

Balance type in the Lunch Flow portal for an N26 account
Balance tab — pick the type that matches your bank app.

4. Check transaction signs

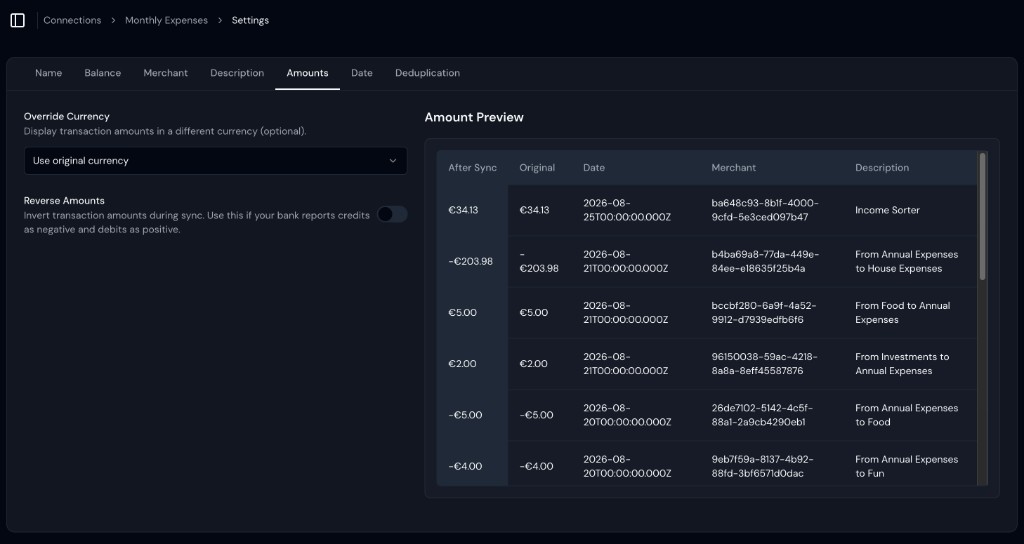
Liquify treats negative amounts as spending and positive amounts as money in. On the Amounts tab, open the preview: if purchases show as positive, turn on Reverse Amounts. Leave it off when spending is already negative—common for checking accounts.

Amounts tab in the Lunch Flow portal with Reverse Amounts off
Amounts tab — turn on Reverse Amounts only if purchases show as positive.

5. Choose a transaction date

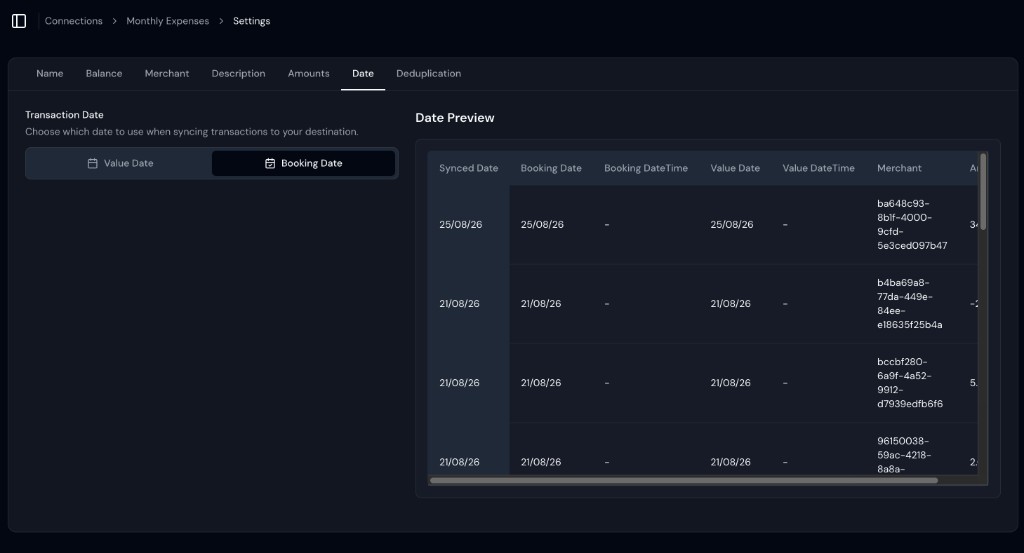
On the Date tab, compare booking and value dates and pick the one that best matches your bank app—usually Booking Date. Value Date is for settlement and can land a day earlier (for example 31 Aug in Liquify when your bank shows 1 Sep).

Date tab in the Lunch Flow portal with Booking Date selected
Date tab — choose Booking Date so charges match your bank statement.

6. Rename accounts so you can find them later

Some banks give every account the same name. In Lunch Flow, open Connections, check each account’s details, and rename it after the Liquify box you’ll link it to (for example Groceries or Rent). That makes Balance, Amounts, and Date easier to tune—and helps you find the same account when you link the box in Liquify.

You’re done when…

Liquify shows the bank on Connect bank / Accounts with balances and transaction dates that match your bank app.

After changing Balance, Amounts, or Date in Lunch Flow, pull to refresh in Liquify (or wait for the next automatic sync). If a connection shows Needs reconnect, reconnect from Liquify and authorise again in Lunch Flow.